Lately, a lot of people have been asking how I make my gold-leafed buttons. I thought I'd just go ahead and spill the beans right here on my blog so you can make them too. It really took a lot of trial and error to arrive at my method, but you might come up with something even better. So, listed below are my steps at making shiny gold button designs on matte black pin back buttons.
Materials
- Image editing software like Illustrator or Photoshop
- Access to a quality color-laser printer
- Transparency film
- Metallic leaf (I use Speedball Simple Leaf sheets)
- Spray adhesive
- Circle template
- Button machine, parts, and circle cutter
- Gold spray paint (I like Design Master 14kt)
Step 1 - The Transparency
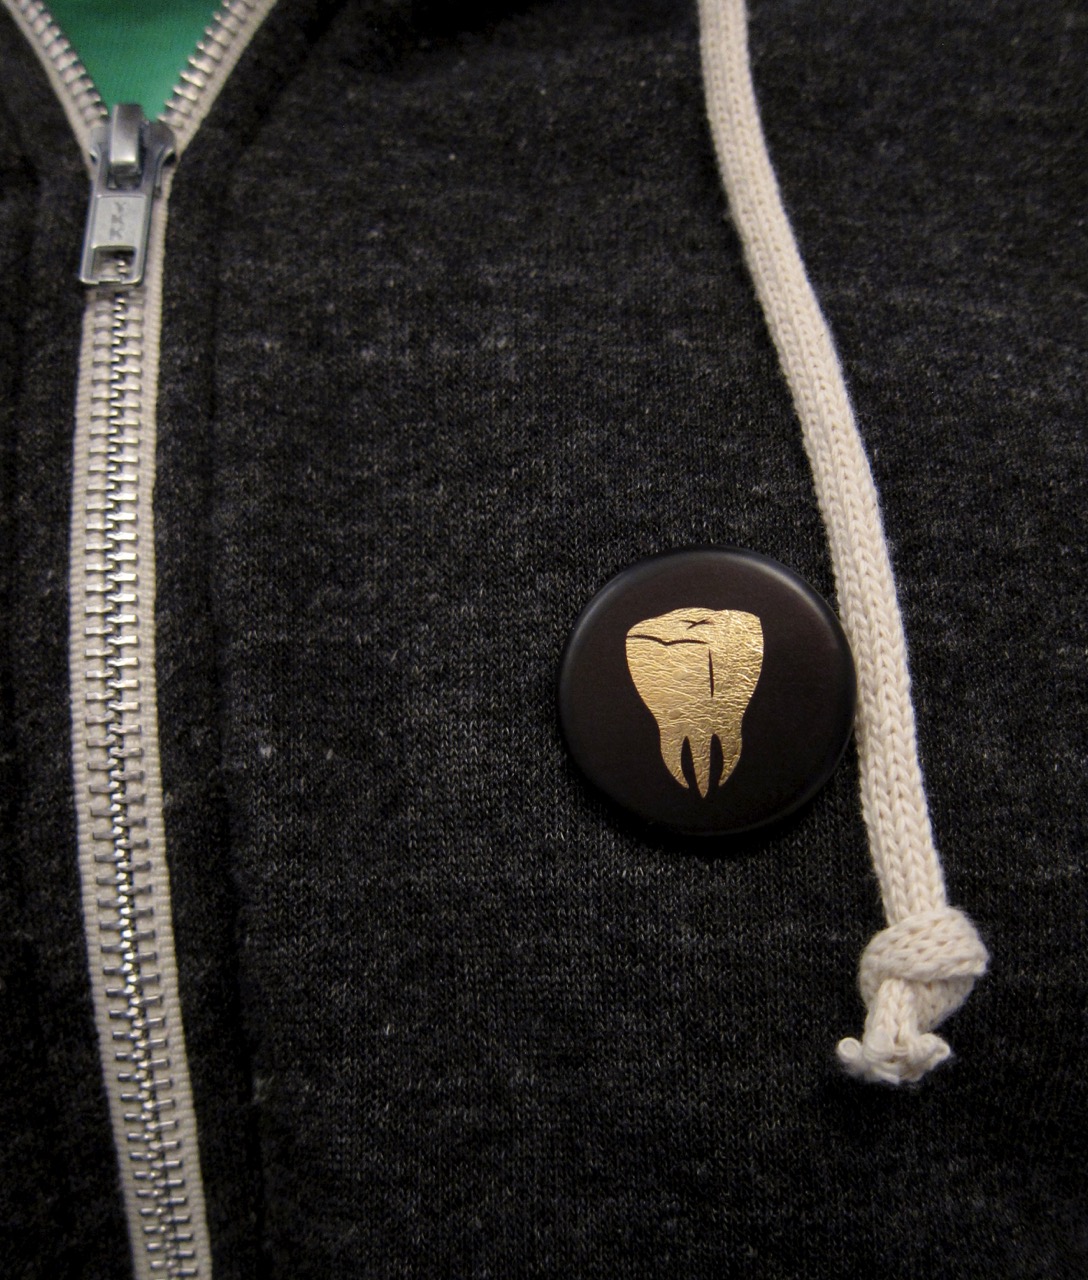
Obviously, the first step is to complete a design that you want to put on a button. I find that gold buttons work best with as few details as possible. Everything "white" in your design will become clear when printed on transparency film, so keep that in mind in your design. Here, I have a tooth that I plan to appear completely in gold. There are just a few lines inside the shape to indicate the volume of the tooth. Make sure that your design is the right size for your button machine and save the file to send to your printer. I recommend setting your document to RGB Color Mode. Also, it helps to convert all black to "rich black".
If you take your file to a copy place, make sure that they use the full-service color machine behind the counter. Fight with them if you have to! What you are trying to get is the best possible image on your transparency, and even though you're probably only printing black, you need a quality color laser printer to print the best black for your button. If you want a matte-black finish on your button, you'll want to use the back-side of the transparency. This is the side that the toner sticks to and this is the side that will be facing up on your button. It can be difficult to determine which side will face up on your transparency, so I print half normal and half mirrored on the same sheet. That way, I know at least half of them will be printed correctly. (If I had my own color-laser printer this wouldn't be an issue but I have to make this as easy as possible for my copy shop visits).
Another reason you'll want to use the color laser printer is the durability of the toner on the transparency. Toner from a black and white laser printer/copier tends to easily rub and scrape off the matte side. We want our buttons to last, so spring the extra cash for color!
Step 2 - Gold Leaf the Blank Button
For this step, you're going to need gold leaf sheets and spray adhesive. I recommend 3M Super 77 Spray adhesive and Simple Leaf imitation gold leaf sheets. I make a dozen or two of these at a time and I do my spraying outside on some scrap newspapers. Super 77 is pretty heavy duty, so a light dusting is all you need. Let it sit for about 30-40 seconds and then transfer the buttons upside down to your sheets of gold leaf (shiny side up). After they are all stuck upside-down to your sheets of leafing, carefully flip the sheets over and rub the gold leaf onto the surface of each button through the protective sheet. Peel up the paper and then clean up the edges of each button with your fingers. Now you should have a shiny gold button surface.
Step 3 - Spray Paint the Pin Back
This could be considered optional, but if you've gone through all the trouble to gold leaf your button, you should finish the outfit with a matching back piece. You could gold-leaf the back but I've found that a little tedious with all of the curvature in the pin back piece. I recommend using a good gold spray paint instead. Remove the pin first. I don't suggest spraying the pin because the paint will tend to rub off over time from opening and unclosing it. It's a good idea to go slowly with the gold paint and keep the nozzel about about a foot away from the surface of the buttons. Two coats is all I've ever needed.
After the backs are dry, maneuver the pins back into place and pour yourself a drink. The hard part is over. You're nearly done!
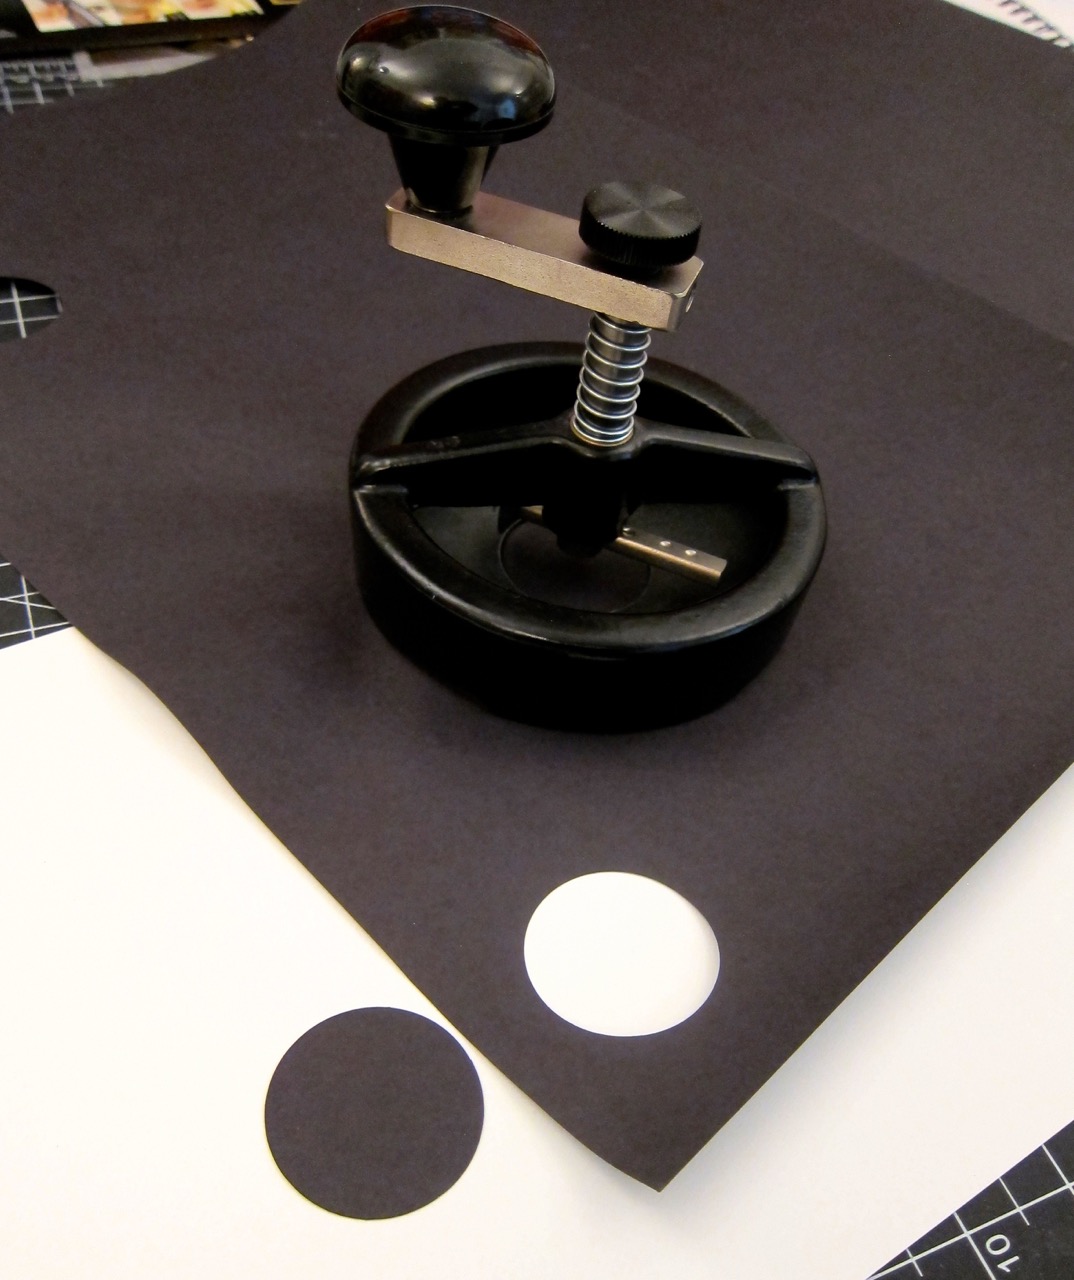
Step 4 (Optional) - "The Donut"
This step is entirely optional, but I think it adds a nice layer of polish to the button. Because toner can be fragile on transparency film (even on the best copiers), bits of toner can rub off when the button maker assembles the finished button. This allows for some of the gold leaf to appear around the edges of the button where the toner has rubbed away. I've found that creating a little black paper "donut" helps conceal these flaws and adds another level of finish to the button. To the right, you can see the difference between a button with the donut and one without. To make one, just use your button circle cutter to cut a black paper circle and use a circle template to mark the area where your design lives. Then cut out the middle and you have yourself a donut.


Step 5 - Assemble The Button
At this point you should have all of the parts you need ready to make a finished gold-leafed button. In my button maker, I assemble the following, top to bottom:
- Transparent cut out (matte side up)
- The "Donut"
- Gold-leafed button surface
- Spray-painted re-assembled pin-back
Finished!
In the end you should have a striking addition to your jacket or messenger bag.
Even though the color toner should be durable enough for normal wear, I don't recommend carrying these primo buttons around in your pocket with loose change and/or keys because they could get scratched.
My tooth buttons are for sale here if you're interested. Best of luck with button making!

Hand pressed 1.25" buttons. The tooth is matte black on gold leaf and the crossbones are matte black on gloss black. Free shipping within the contiguous US.